How to create unique Pinterest Graphics with Canva?
Many businesses overlook Pinterest as a marketing strategy for their business. In the blogging world it’s pretty popular, but even new and emerging bloggers aren’t using this platform to their advantage. Pinterest is a highly visual platform. It’s great for business marketing and it’s important to take this platform just as seriously as the other platforms. This means consistent branding, consistent posting, or in this case, consistent pinning and repinning along with useful content. Pinterest needs high-quality photos and graphics to grab the attention of your target audience or visitors searching for related topics. High-quality graphics that are captivating is the first step to earning repins and an increase in web traffic.
An easy way to create Pinterest graphics is to use Canva. Canva is a user-friendly desktop design tool that is easy to use if you don’t design savvy. It’s much less complicated than any Adobe program. Canva has a Pinterest template that makes it easy for anyone to produce and design graphics for their brand.
Before we get started, it’s important that have a brand style before you design anything. The Brand style is important especially if you want to be remembered quickly. A consistent look that is cohesive with all of your other digital homes (all social media platforms + website) is key.
There are so many brand styles to consider. There are minimal brand styles that only range between white and black colors, there are soft and feminine brand styles, there are fun and bright brand styles and there are dark and masculine brand styles. All brand styles should be consistent with your brand color pattern or brand colors, your brand fonts, and your brand elements. After you've established a brand style, it’ll be easier to design consistently with Canva.
Here's what we will be creating today:

Here’s 4 ways you can create Pinterest graphics with Canva.
Designing with a solid background
You can design a graphic within 3 minutes or less with a solid background, text, and a few shape elements. The great thing about solid backgrounds is that you could choose to use one color but different variations of that color for your graphic. You could also use 2-3 colors to complete your graphic. In this case, 2-3 colors will be used for the design tutorial.
1. In Canva, select Blog Graphic 800 x 1200 from the design template options.

2. Choose a solid color in your brand color pattern and add text, numbers, and elements:

3. Next, add contrasting text sizes to your graphic. Use the largest font size for words you want to place emphasis on. Create separate text boxes to achieve this. You could also incorporate an additional brand color on your graphic to create a more cohesive look.

4. Next, go to the Elements field, choose Shapes and select a hollow shape to create borders for your design. Choose a brand color once the shape populates. For this design, two pentagons were chosen to frame the number in the title. A square was also chosen to create a border to complete the design.

Designing Pinterest Graphics with a Photo Background
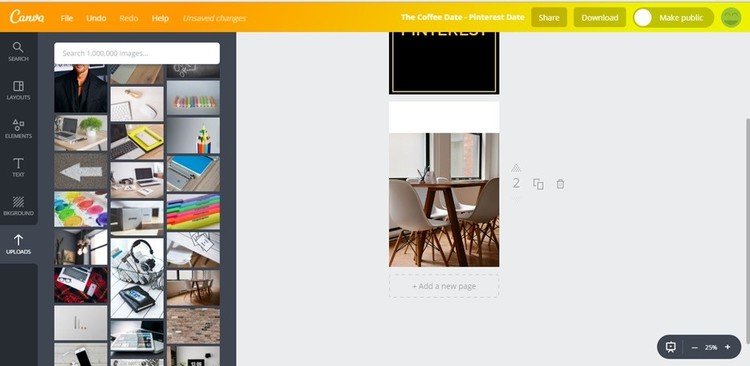
If you prefer a nice photo with your graphic, use the free stock photos provided by Canva or find a free stock photo website that allows you to download professional photos free of liability. My favorite websites are designerpics.com and pexels.com for free stock photos. The next tutorial is similar to the solid background graphic. The difference will be the usage of a photo as the background and the building on top of it.
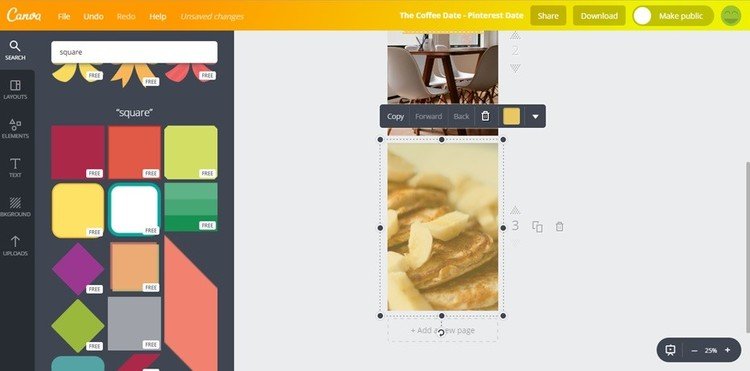
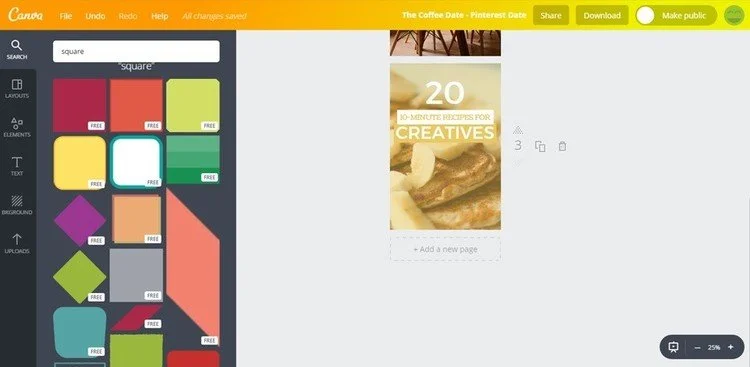
Use the same Pinterest template and dimensions provided. Find a photo for your background and either stretch it over the entire space of the template or halfway to add other elements to your design. The photo used below will be extended towards the lower portion of the template. There will be a solid square added for text:

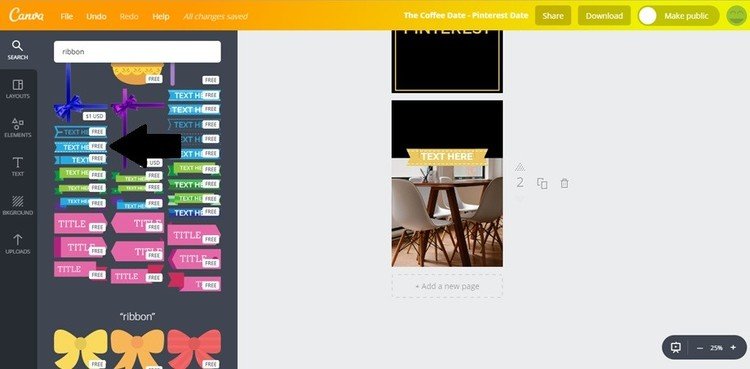
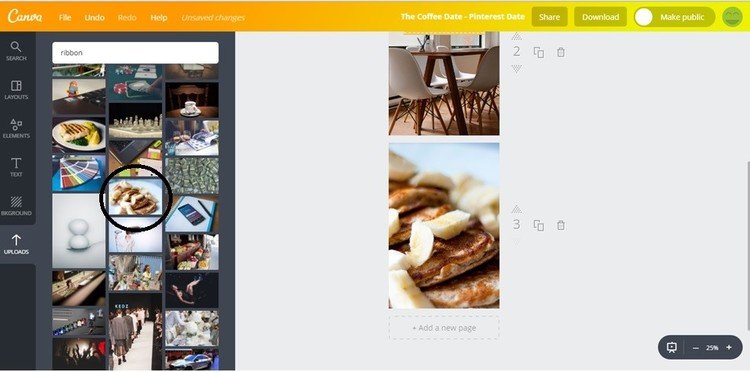
Next, add a solid background for your text, numbers and/or elements. For this design, use a solid square to cover the white space at the top of the photo so the flow of the design looks nice. A ribbon will also be used to marry the shape and the photo:

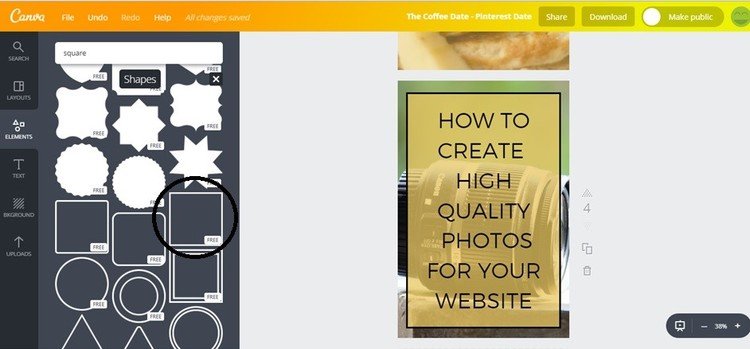
Designing with transparent overlays
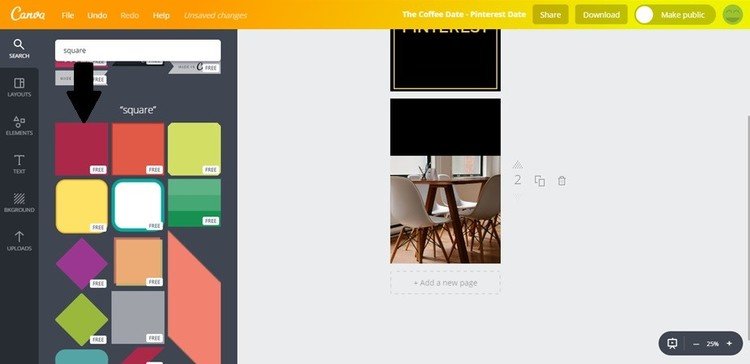
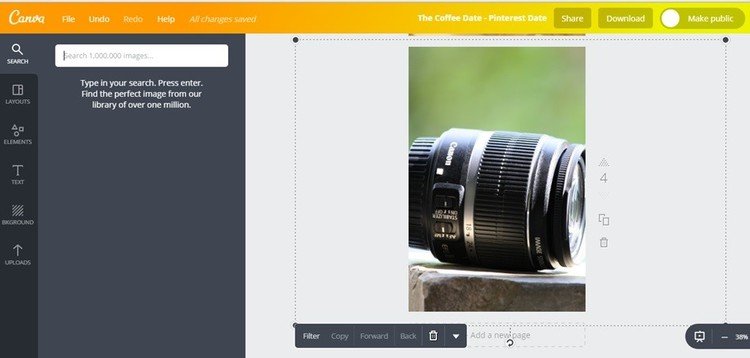
Designing with transparent overlays or transparent objects is the most popular design style on Pinterest. But, don’t worry, you can always create a design that will stand out. I recommend using your darkest brand colors for your overlay so the text is more visible over it. If you use your brightest brand color, use the darkest brand color for text. Lighter and darker colors create contrast which is more flattering to the eye. For this design, choose a photo related to your topic and stretch it over the template:
For an overlay, type the word “square” in the search field to quickly access a light gray transparent square. Select the square and change it to the brand color of your choice. Cover the entire photo with a transparent square before adding your text and elements.
Tip: If you have bright brand colors, you can always use more than one transparent element on your design to show contrast between lighter and darker variations of your brand colors. Or, choose a solid element as a background only for your text. Create the first overlay to cover the photo then chose the same object with a darker brand color to make your text legible.

Another fun way to create a graphic for Pinterest is to use a partial overlay. You can use any element and strategically place it over any area of your photo. Be careful not to create a design that lacks symmetry. Symmetry creates even spaces throughout your design. There may be areas with no elements or text in their space, but it’s not too big or small of a space that the design looks as if it’s missing something.
To create a design with a partial overlay, follow the same steps as before. Find a photo to use as a background, type the shape you want in the Search field or find it in the Elements field, inside the Shapes folder. Place it on your design, and add text and elements.
Tip: If you find an element that is solid but would like to use it as a transparent overlay, dilute the color with the transparency option from the dropdown menu of the object.

Creating Pinterest graphics with Canva doesn’t have to be overly complicated. Three to five simple steps will get the job done! Increase your web traffic by consistently pinning your branded graphics on Pinterest.
Here are the final photos from this tutorial:
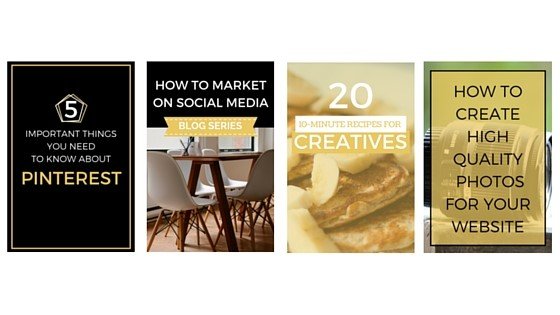
As you can see, all brand styles keep consistent colors and fonts. Choose a brand style, create a template for it and master your Pinterest strategy with epic graphics!
Guest Post was written by:
Natalie Greagor

Natalie Greagor, at www.strategistcafe.com, is a personal brand and online business strategist who helps creative-preneurs (creative-entrepreneurs) grow their business through do-it-yourself branding and marketing strategies. It is her mission to teach emerging creative-preneurs how to overcome limited resources such as money by learning to complete branding projects and marketing campaigns themselves. She helps creatives create cohesive digital spaces on social media and the web. She also helps them define their brand voice and personality as well as keep a consistent online presence with her popular brand sessions and brand audits.
Download her Content Creation Ebook for Creatives here.