An In-Depth Guide To Set Up Your Squarespace Blog In 2023

If you’ve been hoping to launch your website or set-up your blog, then Squarespace has likely popped up on your radar.
With good reason, too!
Blending functionality and aesthetic appeal into one, Squarespace is the go-to website builder for creative entrepreneurs like you. From countless templates to easy-to-read fonts and other features, Squarespace's custom websites tick all the right boxes.
It’s a no-brainer why I highly recommend them!
In this post, I’ll highlight how to start a Squarespace blog in 2023 with a step-by-step guide.
To create your blog with Squarespace, you’ll need to:
● Choose a template for your site
● Add a blog page to your site
● Adjust your blog’s settings
● Enhance your blog using SEO
● Customize your blog layout
● Create a blog post (or many)
● Format your blog post layout
● Update settings for your blog post
● Publish your first blog post
Before we completely dive in, I want to quickly highlight what sets Squarespace apart from other website builders.
Why Squarespace Is Great For Creative Entrepreneurs
Squarespace isn't the only website builder on the market, but it is the most suited for bloggers, freelancers, small businesses, solopreneurs and creative entrepreneurs.
Unlike Shopify's plain interface and WordPress' outdated layout, blogging on Squarespace is far more easy on the eyes.
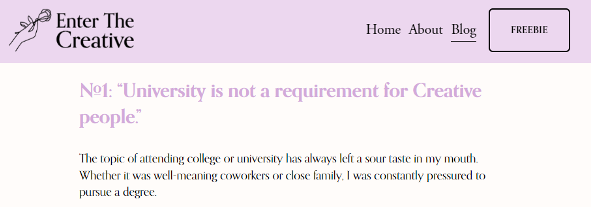
A recent blog post draft from my Squarespace blog.
Squarespace's mobile app also allows for seamless editing while on-the-go, which some other site builders just can't brag about.
You get a 14-day free trial on any Squarespace template -- So, if you change your mind on it, no worries. You can pick another one, play around with the design and launch in just 2 weeks (or less).
Let's pick your template.
Choose a Template for Your Bog
There are dozens of website templates available on Squarespace, so it's crucial to avoid "decision paralysis" -- When you can't make a decision because you fear making the wrong one.
Fortunately, Squarespace allows you to view demo sites with each template. Like what's pictured below for the Idrah template.

A demo site with the Idrah template on Squarespace.
So, how do you pick your Squarespace template?
First, list out the features that you want to have on your own website. Think about the blogs that you follow and enjoy -- What key design feature really stood out to you?
Now, what template can you envision those features on?
Remember that Squarespace templates are completely customizable. You can delete sections, add new ones, change color schemes and fonts, and do so much more -- Even during your free trial.
But, picking your template doesn't guarantee that a blog is already enabled. Next, you'll need to add a blog page.
2. Add A Blog To Your Site
In Squarespace, a blog is just one of the many page layouts you can include on your site.
To add a blog, visit the sidebar on your Squarespace site titled ‘Main Navigation’ and select the plus (+) sign.
Select 'Pages' then 'Add new page'. A pop-up will appear to highlight the layouts available on the template -- Select the layout of your choice, like the one pictured below.

Examples of Squarespace blog page layouts.
Once that's done, you’ll be able to see your blog post in the main navigation tab in Squarespace -- Where you’d see your Home, About and any other pages.
The next step in creating your Squarespace blog is updating your settings.
3. Adjust Your Blog’s Settings
Don’t worry -- This is the most technical part of the process (but Squarespace makes it incredibly easy!). There are 5 main categories of settings:
● General
● SEO
● Feeds
● Social Image
● Advanced
Let’s start off with your blog’s General settings.
General includes how your site’s title appears on your website -- Specifically, in the navigation bar (site menu), browser window (tab window) and URL slug (site link).
To get the most out of this setting, make sure to include a relevant name to your site and URL. Also ensure that you have ‘turned on’ the page by selecting the Enable Page bar.
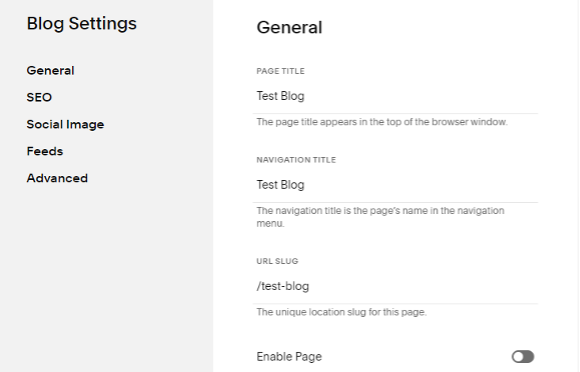
An example of how to update your General settings.
We’ll tackle SEO and Social Image in-depth in a separate section, because both are such crucial parts of blogging on Squarespace.
So, instead, let’s quickly touch on your blog’s Feed settings.
Feed is where creators can add their podcast links to their Squarespace blog - This Squarespace post does an amazing job at explaining the entire set-up process in a step by step tutorial. Here’s a picture of the Feeds setting tab for clarity.

Squarespace setting for Feeds
Lastly, your Advanced settings -- Where you can enable and manage both tags and categories for your blog. I'll show you how to easily create those once we start updating your blog post's settings further below.
Until then, let's focus on the most important metric for a blogger: ranking in Google Search.
4. Optimize Your Blog For SEO
When you create blog posts, the aim is to attract readers and potential subscribers to your email list… Or, at least, it should be.
This is where your Squarespace SEO and Social Image come into play -- Both features help to enhance how you appear in Google search.
Let’s start with Search Engine Optimization (or SEO).
SEO is what gets you on the first page of Google when a potential reader searches for a particular keyword or phrase.
To increase your chance of ranking on page #1 of Google, you must edit your SEO title and SEO description.
Return to the Main Navigation and select your blog page--just like we did before--then select the gear icon. This will re-open your blog settings. Select SEO.

Update your SEO title and description in Squarespace.
Let's say you started a food blog in a particular niche, like healthy vegan options on a budget. You'd need to find a way to phrase that naturally so it fits in both your title and description.
Here's an example of what I would do:
SEO Title: Budget-Friendly Vegan Recipes | My Example Blog
SEO Description: My Example Blog features beginner vegan recipes for college students on a budget. You can find quick and easy vegan meals, vegetarian desserts and affordable all-natural food prep kits here.
These examples show just how specific you can get within your niche. Just be sure to keep your SEO title within 100 characters, and your SEO description within 400 characters.
Don’t wait until it’s too late to enhance your site’s SEO -- Your dream reader could be looking for you right this minute.
Now, on to your Social Image.

Your Social Image settings affect what’s shared on social media.
Your Social Image relies on your SEO settings. It reflects what would appear when readers share your blog with other readers!
If the link to your blog is shared on a platform like Facebook or LinkedIn, then Squarespace would show your SEO title and description in the text box.
You can also add your site logo. Otherwise, though, only your title and description will reflect when your blog shows up on social media.
To change your Social Image, return to the SEO setting and make the necessary edits.
Now that we've covered your settings, we can finally get into the look and design of your blog.
5. Customize Your Blog Layout
Remember when we added your blog page earlier? That’s the same layout that would show up here -- Specifically, your colors and fonts.
Squarespace's templates feature 'responsive design'. So, your website will look the same for both mobile and desktop users -- Which saves you even more time when designing your blog!
Chances are, you already picked your site’s colors and fonts. That same color scheme and font pack would reflect on your blog page by default.
However, you can still adjust them! Just select 'Edit' in the top-left corner of the Squarespace window, then use the paintbrush icon that appears to the right of your screen.
This nifty feature is called Site Styles.

Change your page's design, colors and fonts with Site Styles.
With Site Styles, you can make changes site-wide (ie: changes that affect all pages on your site) to the following:
● Fonts
● Colors
● Animation
● Spacing
● Buttons
● Image Blocks
Besides using Site Styles, you can also customize your site by adding sections to the page.
For example, let’s say you want to convert readers into email subscribers -- You’ll need a newsletter block, right?
Select ‘Edit’ again to access the design function. Hover in-between the sections on your site---specifically, the lines that separate different areas---and a plus (+) sign will appear.
Once selected, a pop-up will show some sections that you can add to your blog page. Some examples are:
● Newsletter block
● Gallery
● Embedded video
● Contact form
Add as many sections to your blog page as you see fit. Remember, though, that this page is where readers will come to, well, read. Keep it as easy on the eyes as possible!
Now that we've perfected your layout, you can start your first blog post.
6. Create Your First Blog Post
What makes Squarespace the best blogging platform for a creative entrepreneur is its sleek and modern back-end. The same goes for the post feature, too!

Create your blog post with Squarespace's edit feature.
Select your blog page from the navigation menu. You will then be shown your existing blog posts -- ie: the example drafts that came with your Squarespace template. I recommend just deleting them!
Next, select the plus (+) sign to add a new post. This will automatically open into a blank blog post through the edit mode (similar to what editing a page would look like).
Just like other blogging platforms, Squarespace has its basic italics, bold and underline features. But there’s also much more -- Including changing the colors of your fonts!
The colors available for your blog post are the same ones from your color scheme. So, for my blog, the pallet would show Grey, White, Purple, Dark Grey and Black.

Your post’s font colors can match your Squarespace color scheme.
And, of course, you should already have your ideas planned using your blog’s Content Pillars -- The categories that your content should fall under.
Your blog post can be as long (or short) as you’d like. Once you’re done, though, be sure to adjust your post’s settings.
7. Update Your Blog Post’s Setting
Now, don’t confuse your blog post’s settings with your blog’s settings.
The main difference is that your blog’s settings affect the entire page, while your blog post’s settings affect this one particular blog post.
Return to the list of blog posts to the left of your screen. Hover over the most recent post and select the 3 dots that appear, then select ‘Settings’.
In this section, I’ll show you the different settings for your post -- and we’ll finally tackle your post’s tags and category/ies!
Your blog post’s settings are:
● Content
● Options
● SEO
● Social Image
● Share
● Location
First up, Content -- Where you can further customize your blog post.
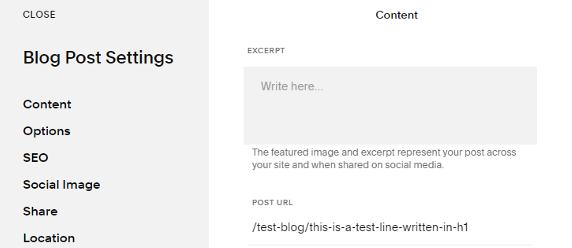
Updating your Content settings in Squarespace.
To start this, we must first create your featured image. When someone visits your page, this photo will be what draws them to click your post.
Think of this as the thumbnail for your blog post. Simply create your featured image in Canva and upload it. Otherwise, this area will be left blank on your page.
Next, we will work on your Excerpt -- Whenever your post is shared online, this snippet will be included in the link (similar to Social Image). You can add a short summary or paragraph here to drum up more interest.
Your Post URL is also customizable. Best practice is to make the URL as closely related to the blog post title as possible. For example, a post on Productivity Tips For College Students would look like www.yoursite.com/productivity-college-students or something similar.
Lastly under Content is confirming the post’s Author.
By default, this would fall under your name. If your site has a lot of contributors---who receive credit for the content---you can select their names instead.
Next up is the Options settings. Here, you’ll have access to:
● Post Status
● Tags
● Categories
● Comments
● Featured Post
For your Post Status, you have the option to select Active, Needs Review, Scheduled or Draft (which is, technically, what your post is).
Tags are essential for blogs that allow users to manually search for posts. Looking up posts for productivity would involve typing in tags like ‘time management’, ‘scheduling’, etc.
Create tags for your post by selecting Tags, then entering any word you’d like to create a tag with. These will then be available for future posts -- You can manage all your tags in your blog’s regular settings. Simply go to Settings -> Advanced -> Manage Tags.
Most blogs have Categories, too. These would be based on your Content Pillars - ie: the main topics that your blog post falls under. You can learn more about them here.
To add categories to your post, select Categories then enter the name of your new category. Future posts will follow this same process. When you’re ready to view all your categories, just go back to Settings -> Advanced -> Manage Categories.
Next, you’ll need to enable your Comments. That means turning on Comments by selecting the ‘on’ tab. By default, comments will be enabled across all blog posts -- But you are free to disable comments, which deletes them after a certain time has passed.
Your SEO and Social Image settings have the same impact as the previous settings -- Just update them accordingly for the post.
On the other hand, there’s your Share settings.

Options to share your Squarespace blog post through Share settings.
These settings give you the option to share the post with your email list via Squarespace campaigns.
You are also able to share via social media accounts, like Pinterest or Facebook, by connecting those accounts to Squarespace.
Your Location settings are just your blog’s legal address. One of the ways this may be useful is in the footer of your emails to subscribers. You’re free to leave this part blank if you don’t want to share your address, or just don’t have a physical office space right now.
So, the hard part is over. Now that we’ve successfully updated your blog post’s settings, we can finally put your blog post out into the world!
9. Publish Your First Blog Post
Launching your blog isn’t the same as launching your first blog post. It’s wayyy easier.
Of course, this part comes after you’ve done your keyword research, formatted the blog post, created your Pinterest pin and edited everything! Once that’s all done, we can publish.

How to publish or schedule your blog post in Squarespace.
There are two options when launching your blog post through Squarespace:
● Publishing it immediately; or
● Scheduling it in advance.
To immediately publish your blog post, re-enter Edit mode then select the arrow to the top-left corner of your screen. Select ‘Publish’. Boom - Your post is live.
To schedule your blog post, follow the same steps but select ‘Schedule’ instead. A calendar pop-up will appear. Select the date and time that you want your post to go live. Boom - Your post is scheduled.
And you’re done. Now you know how to start a Squarespace blog in 2023!
Final Thoughts
Squarespace is the best blogging platform for creative entrepreneurs. It has a pretty easy learning curve and features that are super easy on the eyes. Plus, some of these edits and processes can even be done on the mobile app.
We’ve covered everything you need to know when blogging on Squarespace, namely:
● Choosing a template for your site;
● Adding a blog page to your site;
● Adjusting your blog’s settings;
● Enhancing your blog using SEO;
● Customizing your blog layout;
● Creating your first blog post;
● Formatting your blog post layout;
● Updating settings for your blog post; and
● Publishing your first blog post.
So, with that being said, is Squarespace blogging worth it in 2023? Absolutely!
While algorithms like Google search results change yearly---sometimes multiple times per year---Squarespace upgrades their features, too. This ensures your site keeps up with new SEO practices and starts ranking online ASAP.
They also offer more tools to optimize your blog’s visuals and improve your reader's experience. This makes Squarespace the best blogging platform for a creative entrepreneur.
With visuals and features like these, Squarespace is perfect for beginner bloggers and solopreneurs alike -- Which makes it perfect for you.
Drop any of your questions in the comment section below and I’ll get back to you.
Guest Blogger: Malayka

Hey there, I’m Malayka - blogger and aspiring indie author. I write about pursuing Creative Entrepreneurship over on Enter The Creative. When I’m not working on ETC, I work in ecommerce and freelance as a small business copywriter. Besides drinking coffee and browsing Pinterest, you can catch me working on my debut novel: an Adult dystopian about assassins and their oh-so sinister sibling rivalries. I can’t wait to see what you're creating, too!